Disclosure: This post may contain affiliate links. As an Amazon Associate, we earn from qualifying purchases—at no extra cost to you.
Christmas isn’t complete in my home without a batch of Christmas Tree Brownies crowding the dessert table. Growing up, my Aunt Lila would arrive every December 23rd with a lopsided tray of these fudgy gems, each one hand-decorated with my cousins. We’d fight over the star-shaped sprinkle at the top, crumbs coating our holiday pajamas. Today, I’ve refined her chaotic-but-charming recipe into a foolproof tradition: rich chocolate bases cut into festive evergreens, dressed in minty frosting, and topped with jewel-toned candies. Below, I’ll share how to create these edible holiday hugs — easy enough for beginners yet stunning enough to anchor your festive spread.
Part 1: More Than Just a Dessert – Our Brownie Legacy
The Magic of Edible Evergreens
Christmas Tree Brownies taste like nostalgia. They’re the dessert that taught me food’s secret superpower: turning ordinary Tuesday ingredients into glittering celebrations. Aunt Lila used boxed mix and tub frosting, but her real magic was in the assembly. She’d line us kids up with piping bags (read: Ziplocs with snipped corners) and let us “decorate the forest.” Some trees wore lopsided garlands of M&M’s; others drowned in green sprinkles. Through burnt edges and sticky countertops, we learned creativity mattered more than perfection.
Why This Recipe Wins Holidays
What makes these brownie Christmas trees a year-round request? First, practicality: you bake one pan, cut 8–10 trees, and suddenly your table looks gourmet. Second, they’re wildly adaptable. Nut-free? Skip the pecans. Need vegan? Flax eggs work beautifully. Unlike fussy Yule logs or fragile cookies, mistakes become “character” — a crooked tree just needs extra candy lights! Finally, they’re joyfully interactive. Kids can adorn trees while adults sip cocoa, turning dessert prep into memory-making.
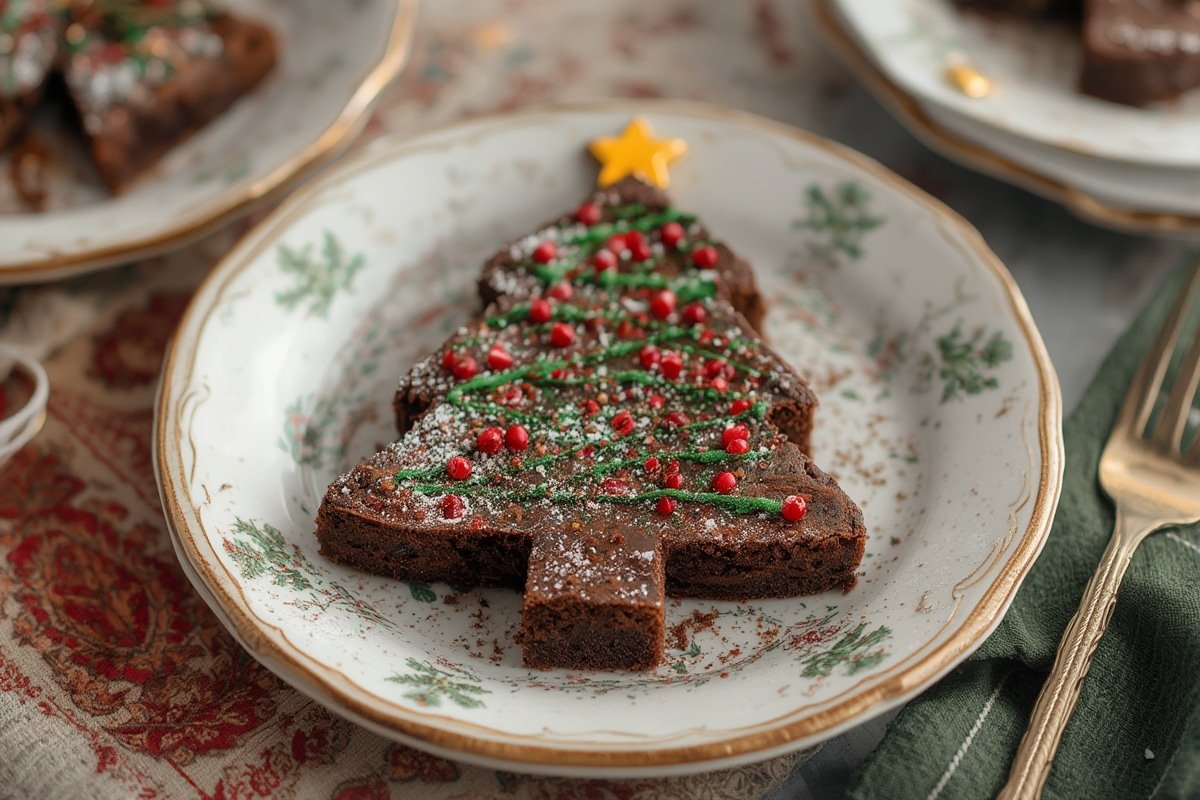
Part 2: Building Your Brownie Forest
Ingredients: Simple Staples, Big Impact
Gather:
- Brownie Base: 1 cup melted butter (or coconut oil), 2 cups sugar, 4 eggs, 1 tbsp vanilla, ¾ cup cocoa powder, 1¼ cups flour, ½ tsp salt. Substitutions: Applesauce replaces half the butter for moisture without fat. GF flour blends work 1:1.
- Frosting & Decor: 1½ cups powdered sugar, ¼ cup softened butter, 2 tbsp milk (any type), ½ tsp peppermint extract, green gel food coloring. Toppers: Star sprinkles, mini round candies (like M&M’s), crushed candy canes, or edible glitter.
Pro Tip: Use gel food coloring—it delivers vibrant hues without thinning frosting.
Timing and Tools
Set aside 75 minutes total (40% faster than frosted sugar cookies!). Breakdown:
| Stage | Time |
|---|---|
| Prep & Baking | 40 mins |
| Cooling | 25 mins |
| Decorating | 10 mins |
Step-by-Step: Fudgy Bases to Festive Shapes
- Mix & Bake: Preheat oven to 350°F (175°C). Whisk melted butter, sugar, eggs, and vanilla. Fold in cocoa, flour, salt until just combined. Pour into greased 9×13” pan. Bake 25–28 minutes (toothpick should have moist crumbs).
- Cool & Cut: Let brownies cool completely (speed this up in the fridge!). Use a Christmas tree cookie cutter (or a knife) to slice trees.
- Whip Frosting: Beat butter, powdered sugar, milk, peppermint. Add green coloring until pine-worthy. Transfer to piping bag fitted with star tip.
- Decorate Like a Pro: Pipe zigzag “branches” on each tree. Immediately add a star sprinkle to the top and candies as ornaments.
Part 3: Creative Twists for Every Table
Flavor Variations to Wow Guests
Swap peppermint frosting for orange zest buttercream or Nutella drizzle. Fold crushed candy canes or chocolate chips into the batter. Skip the cocoa for blondies — frost with white chocolate ganache and pistachio “garlands.” Pro tip: Use stencils to dust powdered sugar snowflakes over trees.
Troubleshooting Common Issues
Dry brownies? Brush cooled trees with simple syrup (1 tbsp water + 1 tbsp sugar, heated). Frosting too runny? Add powdered sugar ¼ cup at a time. No piping bag? Slice a tiny hole in a sandwich bag corner. Brownies crumble when cutting? Chill them longer or use a warm knife (dip blade in hot water, dry quickly).
Part 4: Serving & Storing Like a Seasoned Host
Displaying Your Edible Centerpiece
Arrange Christmas Tree Brownies on a platter lined with shredded coconut “snow” or cocoa-dusted parchment. Surround with rosemary sprigs for an herbal forest vibe. For parties, label names on toothpick flags — kids love hunting for “their” tree. Pair with coffee, cold milk, or hot cocoa for dunking.
Make-Ahead and Freezing Tips
These freeze beautifully! Store undecorated brownie trees airtight for up to 3 months. Frosting freezes separately in bags too — thaw overnight, re-whip, then decorate. Prepped assembled? Keep them room-temp for 2 days (refrigeration dries them out).
Ready to Make Memories?
Whether you’re honoring old traditions or sprouting new ones, Christmas Tree Brownies morph humble ingredients into sweet, edible joy. They’ve survived my cousin’s neon-green frosting phase and last year’s almond flour experiment — proof that imperfection tastes delicious. Whip up a batch, gather your favorite tiny decorators, and let the holiday magic unfold. After all, the best traditions start with chocolate crumbs on the floor.