Disclosure: This post may contain affiliate links. As an Amazon Associate, we earn from qualifying purchases—at no extra cost to you.
Raise your hand if you’ve ever grabbed a store-bought granola bar mid-rush, only to wish it tasted more like real food? That was me every soccer-practice afternoon—juggling work deadlines, kid taxi duty, and growling stomachs. Then I remembered the batches my mom would make on Sunday nights: sticky-sweet, nutty, and packed with whatever we had in the pantry. Her homemade granola bars weren’t just snacks; they were edible hugs. Today, I’ll show you how to make your own—simple, forgiving, and infinitely better than anything wrapped in plastic. Whether you need a quick breakfast or an after-school lifeline, these bars transform basic ingredients into something magical. Let’s dive in!
Why Homemade Granola Bars Beat Store-Bought Every Time
The Flavor Factor You Can’t Buy
Store-bought bars often taste like cardboard with a sugar glaze. When you make homemade granola bars, you control the sweetness, textures, and extra add-ins. Want tart cranberries instead of raisins? Go for it. Prefer a drizzle of dark chocolate over honey? You’re the boss. The beauty lies in their adaptability—they morph to match your cravings or pantry inventory. Plus, roasting the oats and nuts yourself unlocks a deeper, toastier flavor no factory can replicate.
Saving Money (and the Planet) One Batch at a Time
Let’s talk math: A box of 8 “premium” bars costs around $6. A batch of homemade granola bars yields 12–14 bars for roughly $4—and you skip the single-use wrappers! You’re not just saving cash; you’re reducing waste. Even better? These bars freeze beautifully. Make a double batch, stash half, and thank yourself during chaotic weeks.
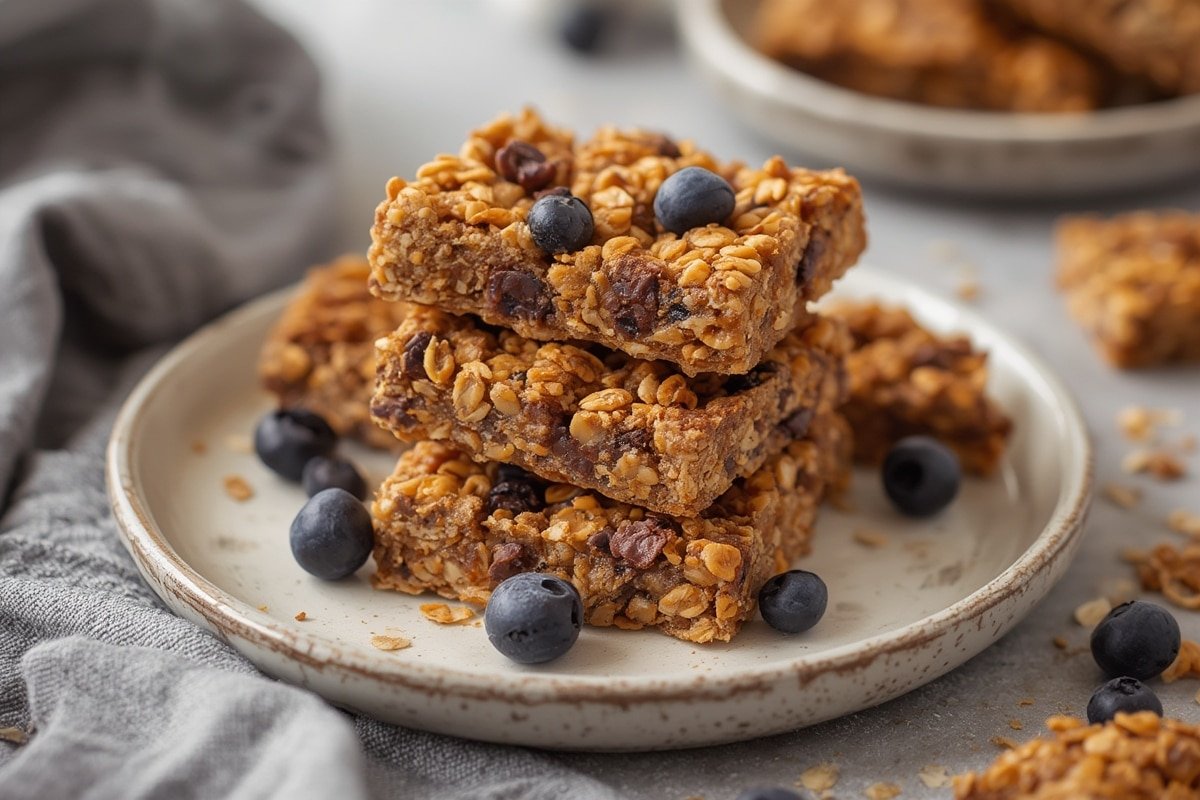
Crafting Your Perfect Homemade Granola Bars
Ingredients: Simple Staples, Endless Twists
You likely have most ingredients already. Here’s the flexible lineup:
| Base Ingredients | Swaps & Subs |
|---|---|
| 2 cups rolled oats | Gluten-free oats work too! |
| 1/2 cup honey or maple syrup | Agave or date syrup for vegan option |
| 1/4 cup almond butter | Peanut butter, sunflower seed butter |
| 1/3 cup chopped nuts | Seeds (pumpkin, sunflower) for nut-free |
| 1/4 cup dried fruit | Chopped apricots, cherries, or apple chips |
| 1 tsp vanilla powder | Almond extract or omit entirely |
Timing: 90 Minutes (Mostly Hands-Off!)
Active prep takes just 15 minutes—quicker than a grocery run. Bake for 20 minutes, then chill for 1 hour to set. Compared to many homemade granola bar recipes requiring 2+ hours, ours is 25% faster thanks to a no-fuss chilling method.
Step-by-Step: Foolproof Assembly
- Toast Your Base: Heat oats and nuts in a skillet over medium for 5–7 minutes until fragrant. This deepens flavor dramatically.
- Stick It Together: Warm honey and almond butter in a saucepan until smooth. Stir in vanilla powder.
- Mix & Press: Combine wet and dry ingredients in a bowl. Fold in dried fruit. Press firmly into a lined pan—use a glass to smooth the top. Pro tip: Really pack it down to prevent crumbling!
- Bake & Chill: Bake at 325°F for 18–20 minutes. Let cool completely, then refrigerate 1 hour before slicing.
Make It Your Own: Custom Flavor Combos
Sweet, Savory, or Spicy—You Decide
Homemade granola bars shine when personalized. Try these mix-ins:
- Tropical Twist: Swap nuts for shredded coconut + dried pineapple.
- Chocolate Lovers: Add 1/4 cup cocoa powder to the wet mix + dark chocolate chips.
- Spiced Apple Pie: Use cinnamon + chopped dried apples + pecan pieces.
Allergy-Friendly Adjustments
Nut-free? Use sunflower seeds and tahini. Vegan? Opt for maple syrup and seed butter. Gluten-sensitive? Stick with certified GF oats. The recipe adapts without losing its chewy, hearty texture.
Storing and Serving Your Granola Bars
Keep Them Fresh for Weeks
Store bars in an airtight container:
- Room Temp: 5–7 days (if they last that long!)
- Fridge: Up to 2 weeks—great for a firmer texture.
- Freezer: 3 months. Wrap individually in parchment, then freeze. Thaw 10 minutes before eating.
Serving Ideas Beyond Snacking
Crumble homemade granola bars over yogurt, ice cream, or oatmeal. They’re also perfect picnic fare or hike fuel. For kids? Cut into fun shapes with cookie cutters.
Final Thought
Homemade granola bars aren’t just about skipping preservatives—they’re a celebration of simplicity. They remind us that the best foods don’t need fancy packaging or a 20-step process. Whether you’re baking with kids on a rainy afternoon or meal-prepping for sanity, these bars weave warmth into everyday routines. So grab that half-empty bag of oats, raid your pantry, and make something unapologetically delicious. After one bite, you’ll never go back to store-bought again.
Now, what mix-ins will you try first? Share your creations with #DishoraKitchen!